What is Rotoscoping?
Rotoscoping is a technique which animaters use, tracing over footage frame by frame for use in live action and animated films. In the visual effects industry is the technique of manually creating a matt over a live action plate so that it can be replaced with another background. Its mostly used within animations.
The history of Rotoscoping
The technique was invented by a man named Max Fleischer who used rotoscoping in 1915 on a film named 'Out of the ink well' he created this with his brother Dave Fleischer dressed in a clown outfit as the live film reference for koko the clown.
Thursday, 19 December 2013
Project 1- Improved shots


We improved this shot by focusing the camera more on 'felix' so that the edge of the professors head is out of focus to show clearly that this shot has felix speaking to the professor. We got less of the professor in the shot so that its clear that the professor is talking to him but still focusing on felix.


For this shot i decided that introducing leading lines to the photograph to show clearly that the shot is aimed at the two characters in the middle. I also tilted the camera slightly from a lower angle so it makes the shot more interesting and individual. It also shows a clear foreground and background within the shot in comparison to the second one on the right hand side.

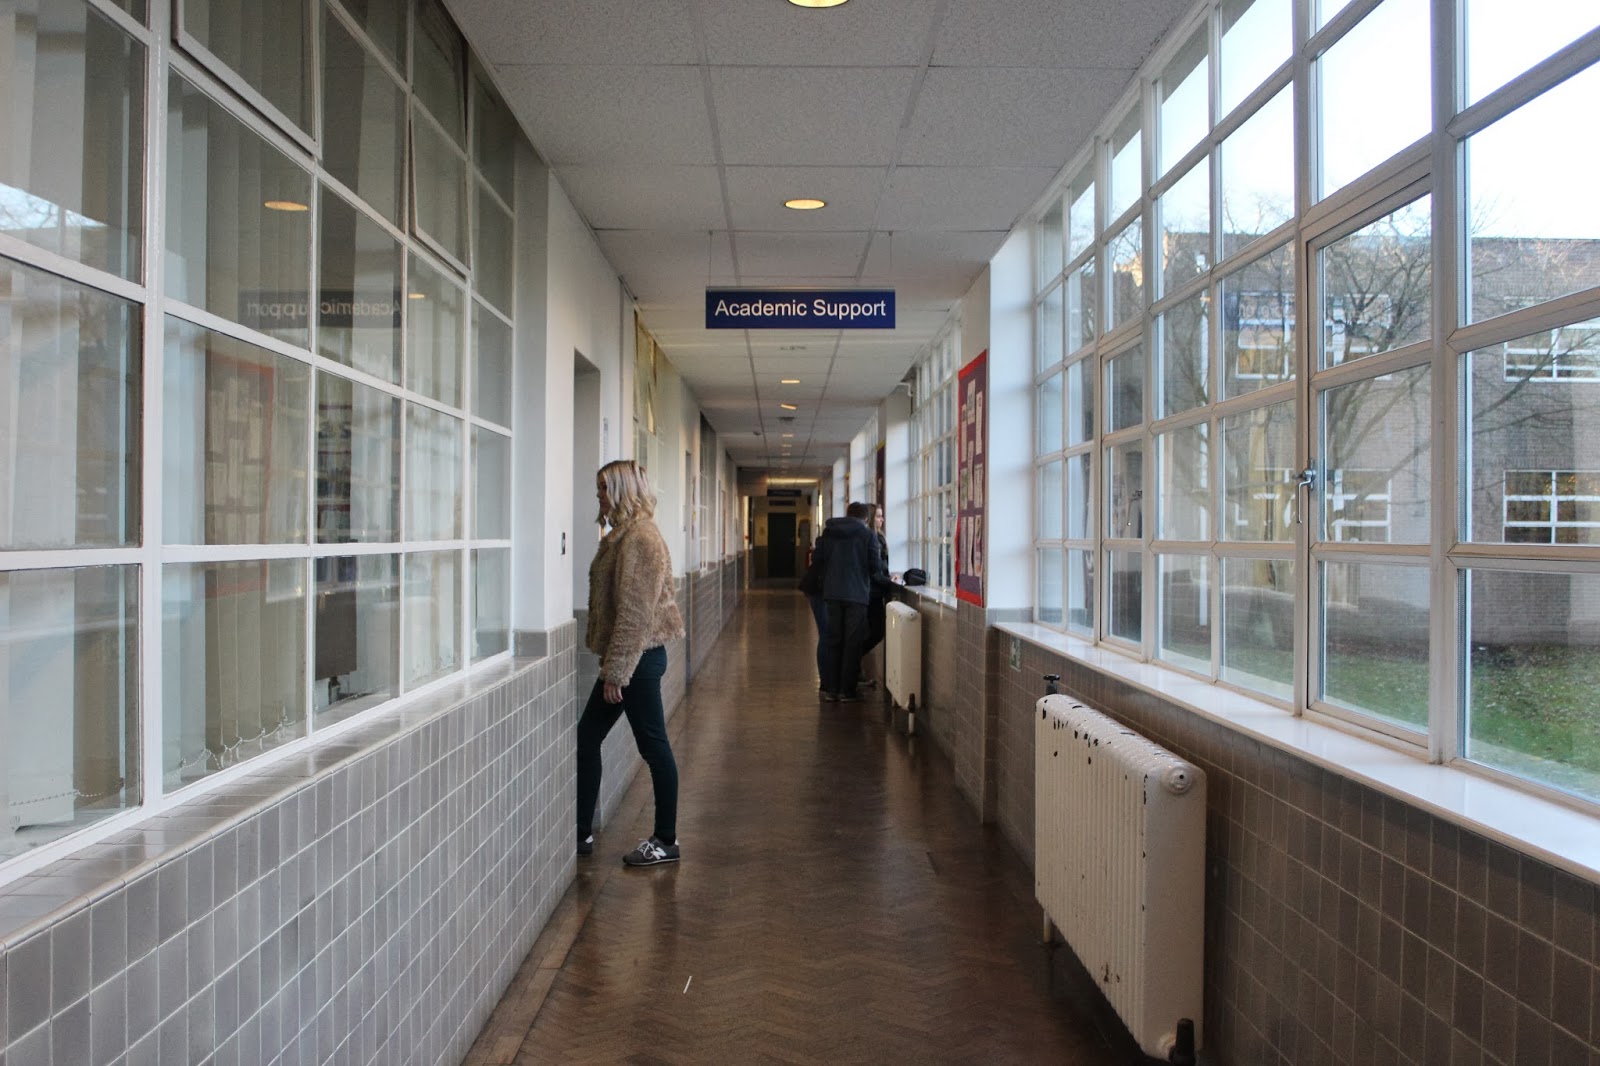 In this shot i believe that the newer shot to the left should be more of a close up of the character walking 'through a door' but this can easily be handled by putting the picture into photo shop and zoomed in so it looks like it is more of a p.o.v shot rather than a long shot. It is also a good shot because of the leading lines which focuses the viewer towards the character which is almost disrupting the leading line, breaking it leading the viewer to focus on the character rather than the hallway itself. The other shot also shows a good example of leading lines although the doorway is too focused considering it's meant to look like a closed door where as the improved shot on the left is not perfect but almost believable.
 This photo on the left shows a good example of focusing the camera on the 'Proffessor' and blurring the hallway to create an intentional shot that clearly shows that the photograph is focusing on the person in the shot talking. In comparison the the other shot which is out of focus and shot from an angle which in my opinion is too high so by lowering the angle slightly and having the camera at a diagonal improves the shot. Using leading lines on a diagonal also made the picture look more interesting rather than a flat straight on mid/over shoulder shot.
Wednesday, 18 December 2013
Matte Painting
What is Matte Painting?
A matte painting is used within films for a scene, background/ set to create an illusional environment that is non-existent or expensive and incredibly hard to create. Usually matte painting is combined with live action footage to create a realistic atmosphere.
The history of Matte Painting
Traditionally, Matte Paintings were made by artists using paints or pastels on large sheets of glass combined with live action footage. The very first Matte Painting shot was made in 1907 by a man named Norman (Norman Dawn) in the movie Missions of California.

Another early shot that included matte painting was in the wizard of oz when Dorothy approaches Emerald City. The wizard of Oz: produced by Metro-Goldwyn-Mayer, and the most well know and commercial adaptation based on the 1900 novel 'The wonderful wizard of Oz' by L. Frank Baum. In this particular shot, matte painting was used to draw attention to a completely abnormal yet realistic 'city' to add imagination to the idea of a large green city which is meant to be the heart of the movie. Obviously the software's and digital ability were not 100%; the way in which they have introduced the matte painting in the scene adds to the idea of almost a cartoon affect within the movie.
 By the mid 1980's advancements in computer graphics were made to then allow matte painters to include digital software's. Throughout the 1990's Matte paintings were still used but more often in conjunction with digital composting. Another film which shows a wide range of different Matte Paintings is 'Mary Poppins' (1964) when 'Mary' is 'flying' with her umbrella over the city in which she is about to be introduced to a family as a nanny. The way which the painter has drawn this background demonstrates how precise the painting itself has to be to allow live action footage. In this particular shot it shows the view of the city under thick clouds to then see Mary Poppins in the sky with an umbrella.

A matte painting is used within films for a scene, background/ set to create an illusional environment that is non-existent or expensive and incredibly hard to create. Usually matte painting is combined with live action footage to create a realistic atmosphere.
The history of Matte Painting
Traditionally, Matte Paintings were made by artists using paints or pastels on large sheets of glass combined with live action footage. The very first Matte Painting shot was made in 1907 by a man named Norman (Norman Dawn) in the movie Missions of California.

Another early shot that included matte painting was in the wizard of oz when Dorothy approaches Emerald City. The wizard of Oz: produced by Metro-Goldwyn-Mayer, and the most well know and commercial adaptation based on the 1900 novel 'The wonderful wizard of Oz' by L. Frank Baum. In this particular shot, matte painting was used to draw attention to a completely abnormal yet realistic 'city' to add imagination to the idea of a large green city which is meant to be the heart of the movie. Obviously the software's and digital ability were not 100%; the way in which they have introduced the matte painting in the scene adds to the idea of almost a cartoon affect within the movie.


Tuesday, 17 December 2013
Project 1-Good and bad shots
Bad


Good
 -I think that this shot is good; its a very plain shot which focuses attention on the characters rather than a cluttered background. Its also looks like he's engaging in conversation with the other character which is the type of shot that we were going for. It also fills up the frame which increases the attention drawn to the image. This means that theres not a lot of empty space within the picture so the viewers more focused on the things that are happening within the frame.
-This shot is good because i believe that it shows a good p.o.v shot as if the camera is the character walking through the hallway and narrates a typical friendship within a college. It is also a good shot because although there are leading lines again, it almost breaks those lines so that the focus is drawn to the two girls. Its also from a fairly high view which could imply that the character is looking down on the girls but the fact there is space to the right shows that there is space for 'felix' to walk into rather than the girls filling up the corridor with no room to move.
 -I personally like this shot because it shows a good example of rule of thirds. This is because there is a shoe in 1/3 the other lifted in 1/3 and lastly the space he is moving onto with a reflection and dirt on the floor which almost shows the viewer that it is a well lit area but not a well groomed area. I also like the angle that it is shot at because it brings mystery to the photo seeing as this is one of the first shots the viewer does not know who the character is, and is left judging the character on first impression by looking at the place which he is walking in, his shoes and the bottom of his trousers.
 -This longshot of college grounds is a good shot because i like the emptiness of the space. This being the very first shot it makes the viewer wonder why the car park is so empty, why the look of the college is so blunt and why even the sky is so grey. It also shows two different angles of the college by shooting it from a diagonal. The zebra crossing draws attention quickly by the boldness of the white colour in comparison to the rest of the college which looks dull.
 -This shot exaggerates the facial expression which the professor is meant to be pulling by a strongly focused close up of the expression. I think this could be even more exaggerated by focusing the camera more on his face and maybe even closer filling the frame to the maximum and blurring the background so it makes the viewer really wonder whats going on within the shot. It could have also been shot on a bit of a plainer background to enhance the character although i do like that a small part of the other characters face is within the shot so it is still clear that they are within conversation.

Tuesday, 10 December 2013
Different ways of moving clips from Premier to After effects
1.
File-export media - choose the settings that you would like to export the media as- choose the format- usually DVI/Quicktime but not recommended to use 'animation' because it takes up a lot of space- PNG
2.
Dynamic link connection- must save project if you make any changes, its not the sequence that becomes the asset, it's the project itself, next lasso all the clips together- right click- replace with after effects composition. It will send the whole combination of different clips and transform them into one full sequence. Create the new project which is now in after effects, name it, and save.
3.
Select all the clips, hold and drag the clips holding alt which will duplicate the clips to wherever you drag it and take one sequence dragging it into after effects which keeps the original 3 clips and transforms another copy into after effects with a complete sequence.
Sunday, 8 December 2013
Star wars green screen analysis
http://www.youtube.com/watch?v=NQxrJBNQg4A
The green screen for most of this film but especially this scene was used to show the viewer a different world to their own. It was used to create the impossible realistic and to keep the fight within an interesting environment so that the viewer stays attached to the scene and keep the idea of each character not being 'human' and living in an un-natrual world to their own. It was used to create the scenery within the fight between each character and to create the back drop realistically rather than modeling the whole scene by hand. Personally i believe that the film/scene is not realistic at all but exaggerates the idea of a serial atmosphere and creating a world of the impossible so well that it is almost believable by not only the green screen but the costumes and characters used.
The green screen for most of this film but especially this scene was used to show the viewer a different world to their own. It was used to create the impossible realistic and to keep the fight within an interesting environment so that the viewer stays attached to the scene and keep the idea of each character not being 'human' and living in an un-natrual world to their own. It was used to create the scenery within the fight between each character and to create the back drop realistically rather than modeling the whole scene by hand. Personally i believe that the film/scene is not realistic at all but exaggerates the idea of a serial atmosphere and creating a world of the impossible so well that it is almost believable by not only the green screen but the costumes and characters used.
Research and understanding green screen
A green/ blue screen is a special effects film technique involving filming actors against a blue/green screen on which effects such as computerized graphics can be added later and integrated into a single sequence. The green or blue screen is usually used to film the impossible; graphics that are so high maintenance to create in real life such as: cars exploding, a un-natrual world scene/atmosphere ect..
When special effects were first introduced in the 19th century a man called George Melies, he created a film called 'Four heads are better than one' he used a visual trick which was the very beginning of what we now believe is 'green screening' This film was created in the year of 1898.
http://www.youtube.com/watch?v=RzsdqsiJQ6Y
He did this by combining multiple shots together into one and this then resulting in a successful 'illusion' to the viewer. They called this the 'matte' shot, which was the very first visual illusion on television to be created. From then on this 'trick' was no longer used to create comedy for the viewer but slowly developed into more serious clips to make a scene more believable or impossible. After this, the effect called “black back matte” which was called the Williams Process was used quite famously by John P. Fulton in 1933 for the film “The Invisble Man”. The shots where the invisible man was taking off his clothes were accomplished by photographing actor Claude Rains wearing a full black velvet suit standing against a black background. This effect was so memorable and startling it was used on follow up sequels even after more effective processes came along.

The Williams Process had some issues – for one, any shadows on the subject would be lost in the traveling matte. An alternative came about in 1925, invented C. Dodge Dunning which would eventually be called the Dunning Process

This technique produced some of the best travelling mattes of the time and was used by Disney first on film The Parent Trap and then The Absent Minded Professor both in 1961. Mary Poppins in 1964 demonstrated the capability of the sodium vapor process winning an academy award for best special effects. After all of these processes took place, the digital camera became more complex then linking with different softwares and products to create a life like special effect picture.
Thursday, 5 December 2013


Tuesday, 3 December 2013

Project 1-Animatic Peer Feedback
Joshua Vallely-
As a whole each shot that has been composed within the sequence of story boards does narratively make sense and is very clear/easy to follow. Regarding special effects within the sequence none that i know of has been clearly made in the story board. The dialogue within the sequence is a little engaging, with more tone it will be more engaging and keep the viewer interested but as a whole it is good. I personally think that there are a couple of shots that seem too long ( Shot 1 and shot 3) The sequence itself could be improved by, perhaps add some examples of powers from other students when filming rather than talking about just the main characters powers (show some examples) The technical quality of the animatic could be improved by using more movement because the animatics of each shot seems a little stiff.
As a whole each shot that has been composed within the sequence of story boards does narratively make sense and is very clear/easy to follow. Regarding special effects within the sequence none that i know of has been clearly made in the story board. The dialogue within the sequence is a little engaging, with more tone it will be more engaging and keep the viewer interested but as a whole it is good. I personally think that there are a couple of shots that seem too long ( Shot 1 and shot 3) The sequence itself could be improved by, perhaps add some examples of powers from other students when filming rather than talking about just the main characters powers (show some examples) The technical quality of the animatic could be improved by using more movement because the animatics of each shot seems a little stiff.
Monday, 2 December 2013


Thursday, 28 November 2013
Project 1-Team Production Meeting - special effect practice
Today we had a team production meeting and decided that our group was ready to begin filming our special effects as a practice. Firstly we decided to film the 'walking into a wall effect' by doing this we had to go to C block corridor and film Edwyn walking through a corridor, turning towards a wall and having some sort of contact with the wall (Walking into the wall)
After filming this we sat in class and started trying to work on the footage of Edwyn. This proved difficult because when filming there was other people in the corridor walking so it was hard to cut the clip of Edwyn walking away so that we could film the blank wall. In resolution to this we filmed edwyn outside where there was no distractions for editing. Edwyn would walk up to the wall, walk into it, stay there for approximately 3 seconds and then exit the shot. We tried pausing the camera and then have him off screen but this disrupted the shot as the camera very slightly moved so this would be hard to edit. We then took the finished sequence, put it into after effects and started to edit.
This was successful but next time we use this effect i think it would look more realistic and effective if we had the boy jumping onto the wall. This would also improve the look by making the effect more abnormal and interesting. Editing the piece was not essentially difficult but could be made perfect rather than a rough try of successfully accomplishing the effect.
I used key frames to make the opacity of the boy lower as if ghost like and i also used the pen tool to mask out Edwyn to then make him disappear. The costume isn't a big deal because the character 'Felix' that we are trying to portray is a casual boy that can wear anything seeing as the setting is within college grounds.
Tuesday, 26 November 2013
Project 1-Special effect practice
To achieve making a 'walking through wall' special effect:
Firstly we filmed Edwyn walking up to a wall and making as much contact as possible to the wall (walking into the wall) he then stayed there for roughly two seconds and walked off camera. Walking off camera is better because pressing pause to film the empty wall will slightly jolt the camera out of position meaning that when it comes to putting it into special effects it will then make it a lot harder to mask ect. I then imported the video into After Effects and cut the part of Edwyn walking off camera so that i then had a video of him walking to the wall and then cut straight to an empty wall. After this i created a still image of the empty wall and put it as a bottom layer throughout the whole film. I then created a key frame around Edwyn and just before he reached the wall to give the effect of him disappearing. Lastly i went on the mask effects and lowered the opacity just before he met the wall and lowered it even more when he got to the wall.


Monday, 25 November 2013
Sunday, 24 November 2013
Project 1-Visual Effects Research
Each shot that contains a visual effect within our shot list does not show clearly which visual effect we should use and where it should be used but i have some brief ideas of where the main visual effects could be.
Shot 3- M angle/ camera focuses on various students
In this shot, Felix is looking around the corridor at students showing their powers in practice. I think that within this shot there should be a few visual effects divided between each other so that its clear that it is a college for mutants.
Visual effects 1- A girl/boy walking through people/ walls

 Visual effects 2- Mutant eyes
-Harry Potter
Shot 13- 'I turn into inanimate objects' Visual effects 3 - inanimate objects
This visual effect could quickly split off to Felix turning into an inanimate such as a pot or something like that.
This would create humour and show a good quality visual effect to grasp the viewers attention.
Shot 3- M angle/ camera focuses on various students
In this shot, Felix is looking around the corridor at students showing their powers in practice. I think that within this shot there should be a few visual effects divided between each other so that its clear that it is a college for mutants.
Visual effects 1- A girl/boy walking through people/ walls

 Visual effects 2- Mutant eyes
- Misfits
-Harry Potter
Shot 13- 'I turn into inanimate objects' Visual effects 3 - inanimate objects
This visual effect could quickly split off to Felix turning into an inanimate such as a pot or something like that.
This would create humour and show a good quality visual effect to grasp the viewers attention.
Thursday, 21 November 2013
Tuesday, 19 November 2013
Project 1-Team production meeting 2
Within this lesson we decided that we would use Edwyns script to use for the opening to the super hero movie. We had the idea to introduce the 'timers' (characters) from my script into Edwyns story. I personally like the 'timers' purely because of the special effects we could create with reversing time in te characters eyes. In the end we decided to use Edwyns script because we all agreed that adding parts from my script would mess up the story line and complicate the script. In scene one we decided to use Edywns idea for mid shot and following and Caspers idea for when they walk into a room (long shot. From there we used edwyns shot list.
Project 1-Team Production meeting 1
We have been set a task to arrange ourselves into groups of 3 and produce a short, 2 minute long opening to a super hero movie to introduce the characters and use at least 3 special effects within the film. I share a group of two more students: Casper and Edwyn. We call ourselves Gatyears. Within the first meeting to discuss who's script we will use Casper was present but Edwyn was not. We wrote down a series of things which would be included in our opening film. The script assessment included: ENTERTAINMENT-Narrative, Characters, Dialogue. FEASIBILITY- Casting, Time and Location. EFFECTS- Range of VFX, Impressiveness and Achieve-ability. After completing the sheet me and Casper had a discussion on who's script to use A) Caspers- B) Edwyns C) Mine. We did not come to a solid agreement so we will discuss this with Edwyn in the next lesson.
Project 1-The 180 degree rule

The 180 degree rule (Axis of action) is a rule in which a camera man follows by when filming 2 or more people. This is used so that the viewer does not get confused with whats going on throughout the scene. The 180 degree rule can potentially be broken if on purpose to confuse the audience in a scene which is made for confusion. As shown in the picture above, if filming head on at the actors the blonde actor will always be on the left and the brunette on the right, if switched round to the other side the blonde actor is now on the left and the brunette on the right.
Monday, 18 November 2013
Point break write up

This task was to successfully add audio sound effects to a sequence from point break which included a chase. I personally didn't find this extremely enjoyable purely because throughout each clip there was continuous running throughout and keeping a running patternt throughout the whole sequence was challenging because each time the characters ran adding a different audio sound to where abouts the characters were e.g. inside/outside/running up stairs ect.

 Here is where i added an explosion which was successful. The problem with this part is you need to make sure that you get the explosion just in the right place to make a realistic scene. This is so vital that this is literally between mili-seconds to be able to get the audio in time with the part in the sequence. In order to arrange this explosion within the right place, i still needed to have each sound effect layering over each other, as shown in the first picture. I think that this was very effective because the sound of the cars , the street and the running foot steps made a complete , realistic feeling to the piece.
Tuesday, 12 November 2013
Audio analysis and how the elements co-operate
How Diegetic, Non-diegetic and Voice over co-operate

In the opening clip to X-men 1 it uses a series of diegetic, non-diegetic audio and a Voice over to complete the opening scene. Firstly the clip introduces a conversation between Wolverene and Proffesor X, this introduces the scene well by giving the viewer an idea and expectation of the events within the opening. It also begins with music underneath the dialogue (non-diegetic) this contrasts with the dialogue giving the scene a mood. The music has no vocals within the song so that the viewer can stick to whats going on throughout. When Proffesor X begins to talk to Wolverene it shows a group of boys playing basket ball, Proffesor x pauses in the voice over. He does this so that the viewers can hear one of the boys say 'hey no powers' which narrates the scene clearly because by the atmosphere it is set in, it shows the audience how to them that's normal life. The music also competes with the diegetic audio by playing underneath the diegetic dialogue quietly as if the music itself is contradicting the scene by playing a calm, almost magical sequence. Once the diegetic and non-diegetic audio has narrated the short clips, the voice over returns and begins to narrate the clips again : 'To the public...' which also contradicts the scene thats being set purely because the boy is running across water. This
clip has no diegetic sound effects which shows that the activity within the
school is being hidden from the rest of the public, it’s shown as if the viewer
is looking from a perspective that doesn’t know what the school is capable of and
focusing on the voice over more than the scene but also paying attention to the
fact that the boy is running on water. The non-diegetic music changes key, it
begins to become lower which is more mysterious co-operating with the clip of
the idea that it’s unknown. After this, above the voice over flying disks are
narrated by a strong diegetic sound effectwhich shows the viewer what to associate
the sound with. Each diegetic, non-diegetic and voice over works well together building the scene slowly to eventually

Saturday, 9 November 2013
Project 1-Misfits visual effects
Misfits - Visual Effects Analysis
- For the introduction to the series it shows a number of animated pictures to narrate each character. They have done this by filming each character and placing them on an animated back drop to explain each character and their powers. -Opening
- A dark cloud appears in the sky moving towards the characters - 04:36

- Rocks continue to fall from the sky - 05:02
- Long shot of boulders hitting the area - 05:17
- Lightening strikes and black opacity increases around characters - 06:11
- Slow motion characters falling back - 06:13

- Eye flashes colour - 06:33
- The sun rises and Nathan is sleeping in the youth centre (sun dot) - 13:49
- Simons head jolts quickly from side to side - 17:41
- Simon can't see his reflection in the mirror - 18.25
- Simons head jolts again - 19:14
- Simons reflection appears in the mirror - 19:14
- Probation workers eyes go glassy - 22:19 (could be make-up)
- Kelly gets hit by a pole and blood flies on wall - 30:02
- Slow motion falling back - 30:16
- Pauses - 30:18
- Zoom in and out into Curtis' eye and sees reflection in eye - 30:27

- Simons neck pulsates and streaks of brown - 34:18
- Blood splatters on probation workers head - 35:09
- Blurred camera - 36:30
 - Throughout this scene, focus on characters and blur surroundings - 36:30 - 38:49
- Reflection of Kelly in window - 38:57
- Reflection of Nathan in window - 39:03
- Blurred Simon - 39:18
- Blurred controller - 39:49
- Focus on Simon - 40:14

Friday, 8 November 2013
Project 1- Drive diegetic analysis
Drive analysis (diegetic sound)

Diegetic sound is main elements within a clip or film that
either build tension or sets the scene by using different back ground sounds.

In the very opening of the scene to
‘Drive’ the first immediate element that the audience hear is a piece of music
(non-diegetic) with the sound of a police siren over lapping the music. This is
used to give the audience an immediate reaction to the clip and decide for
themselves the genre or scene that the sound is trying to create. As the police
siren is played there is a long shot of a city in the dark which gives the
viewer of an idea of where it is set and the mood of the scene.

At first, the diegetic sounds do not make the audience believe instantly that there is tension within the scene. The basketball game is on the radio and there is the sound of the driver (Ryan Gosling) driving the car which seems fairly normal to the atmosphere given. The driver watches two men walk behind the car and sets his watch hearing the ticking noise to exaggerate tension so that the viewer knows that he has a certain amount of time to complete the task that he is about to experience.
A siren starts going off when the two men break into the
building almost breaking a quiet atmosphere which gives the audience a vivid
idea that something bad is about to happen. The driver then turns on the police
radio over the top of the cars radio and the siren in the background. This
shows tension slowly building as each sound effect added makes the audience
question the drivers fate becoming confused, relating to the confusion of
sounds within the scene building tension. He turns up the volume of the radio
(basketball game) which makes the viewer believe that the driver is a normal
person listening to the game. This could also mean that the driver is worried
but distracts himself from the atmosphere by turning the volume up focusing on
something else until his task is complete.
The swing of the door opening grabs the drivers attention but he still stays calm within the scene. By the driver being calm whiles all these things are happening around him, it gives the audience a sense of tension and worry, asking themselves why he’s so calm. The driver opens the back door for the robber and a high pitched slow beep lets the driver know that the door is open, almost reminding the driver and the viewers what is actually going on. The audience question : Why is he opening the door for him? The sound of a bag rustles as the robber gets into the car; you know that something bad has happened along side the costume choice of the robber. The basketball game is still playing in the background to remind everybody in the scene and the viewer that it is as close to reality as it gets. As the driver starts his car to go the engine becomes louder and clearer in contrast to the beginning when he was driving. This shows that he is in a rush for something but the viewer doesn’t know what yet, and just by the sound of the car it makes the viewer want to watch more.
The swing of the door opening grabs the drivers attention but he still stays calm within the scene. By the driver being calm whiles all these things are happening around him, it gives the audience a sense of tension and worry, asking themselves why he’s so calm. The driver opens the back door for the robber and a high pitched slow beep lets the driver know that the door is open, almost reminding the driver and the viewers what is actually going on. The audience question : Why is he opening the door for him? The sound of a bag rustles as the robber gets into the car; you know that something bad has happened along side the costume choice of the robber. The basketball game is still playing in the background to remind everybody in the scene and the viewer that it is as close to reality as it gets. As the driver starts his car to go the engine becomes louder and clearer in contrast to the beginning when he was driving. This shows that he is in a rush for something but the viewer doesn’t know what yet, and just by the sound of the car it makes the viewer want to watch more.
Subscribe to:
Comments (Atom)